I can’t imagine a world without bread. Perhaps it’s the Scandinavian in me, but I feel tremendous happiness in enjoying a big hunk of bread, slathered with butter or some other topping, paired with a nice glass of wine. Give me that, and that’s all I knead (pun intended).
We have a great bakery in town that makes rustic, artisan loaves to die for, but there’s nothing more satisfying than digging your teeth into a homemade loaf. I know exactly what ingredients have gone into it, and can play around with different flours and seeds.
One of my most viewed and shared recipes on my blog is the post I made about Norwegian bread that also lists some health benefits of bread. I make that recipe nearly every other week for my husband, as he enjoys bread in the morning, and sometimes even in the evening.
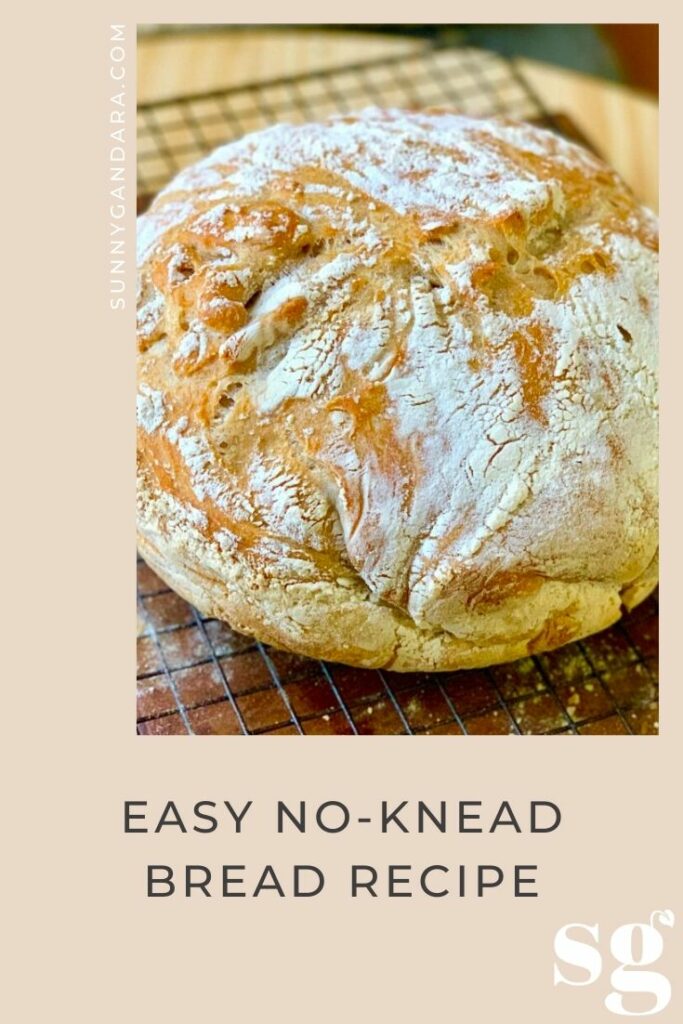
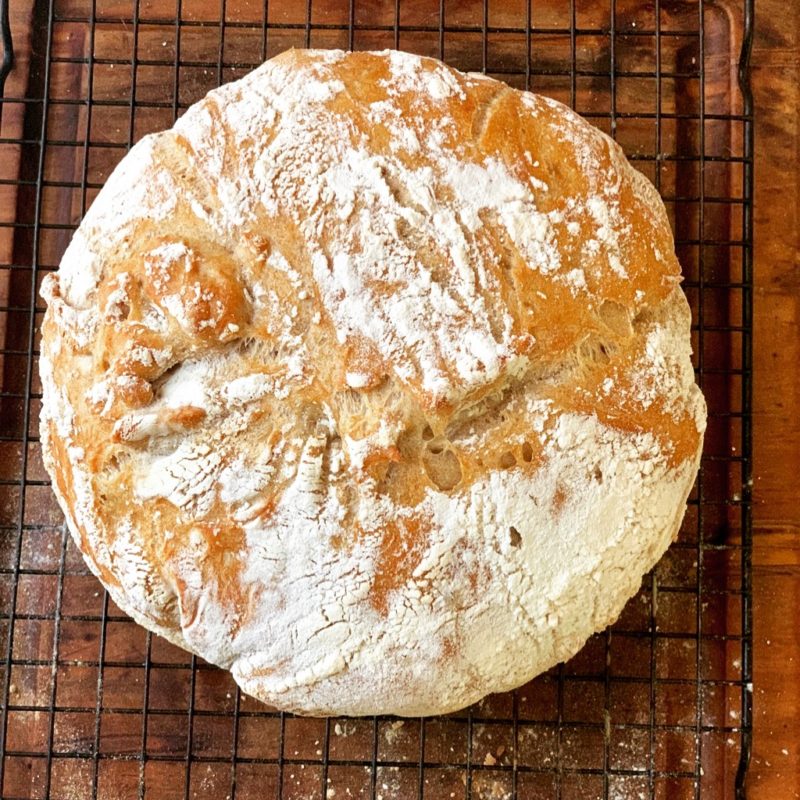
Given my love for baking savory things, I set out to make a no-knead loaf that gets baked in a Dutch oven. You would be surprised how easy it is to make.
First of all, as the title suggests, the dough doesn’t require kneading.
Secondly, by leaving it overnight for about 12-24 hours it develops the most complex, delicious yeasty notes that reminds me of breads I buy in a bakery.
Thirdly, it looks professional without me even making much of an effort! I think this is the magic of baking it in a Dutch oven.
Bread has always been a part of the Norwegian diet. The whole grain loaves we think of as bread today with added seeds, however, is actually a new phenomenon that only started in the early 20th century.
In the old days, loaves were only found in the cities. In the countryside, a loaf of bread was called stump or kake (cake), while bread was actually flatbread. Flatbread was consumed daily, often accompanied by porridge, referred to as ‘your daily bread’. Rye was a common flour used in bread making in Norway, followed by barley and later wheat and oats.
This bread is a more modern bread, and not necessarily typically Norwegian. In Norway today, people enjoy all sorts of bread from sliced, whole grain breads, to baguettes, focaccia, pizza/flatbreads and crackers. Whether for breakfast, lunch, or an evening snack, I think bread will continue to be one of the most popular foods in Norway for centuries to come.
I love this no-knead kind of rustic bread with a nice big bowl of pasta (yes I love carbs), or a green salad, layered with vegan mozzarella and fresh, juicy tomato slices from the garden or spread with some homemade pesto. You can go Norwegian-style and top it some slices of cheese (vegan for me) with sliced cucumbers and peppers or spread some jam on it and enjoy with a nice cup of black coffee or tea.
Either way you decide to dress it up, I’m confident you’ll be inspired to make it again and again.
Happy baking!

NO-KNEAD BREAD RECIPE
3 1/3 cups or 1 lb (450 grams) all-purpose flour
1 1/4 cup or 5 ounces (150 grams) whole wheat flour
1/2 tsp active dry yeast
2 tsp sugar
1 tbsp kosher or sea salt
2 cups (5 dl) water
Add all the dry ingredients to a big bowl and mix together with a wooden spoon or a spatula.
Add in the water, and quickly combine into a wet dough until no streaks of flour appear. The dough should be sticky but not super runny. Adjust with a little water/flour if necessary until you get the right consistency.
Place a clean towel over the bowl or cover with a lid, and let sit on the counter /room temperature for 12-24 hours.
After the resting period, you’ll now need to ‘fold’ the dough. I liken it to folding an envelope. Using a spatula, pour the dough onto a big sheet of parchment paper. It will most likely stick to the parchment and bowl, so sprinkle with additional flour to make it easier to work with. Start with the edge closest to you and fold it over towards the middle of the dough. Repeat with the other edges, and keep folding the dough over. I typically use my hands but you can use the spatula as well. Refer to this video to see what I mean by folding, although in this video they use water instead of flour to prevent the dough from sticking. If you have a bowl that’s wide and big enough you can do this process in the actual bowl as well, instead of pouring it onto the parchment paper.
Place the dough with the folds face down, and cover with the bowl. Let rest for another 2 minutes. If you decide to do the folding process in the bowl, cover the bowl with a lid or a clean towel.
Half an hour before you’re going to bake the bread, place a Dutch oven WITH A LID (very important) in the bottom rack of a cold oven. Then preheat the oven to 500 degrees Fahrenheit (250 degrees Celsius).
Remove the hot Dutch oven, open the lid and place the dough carefully into the hot vessel (you may need to use a spatula as the dough will still be sticky. Sprinkle a little flour on top, put the lid back on and place it in the oven and bake with the lid for 30 minutes. After 30 minutes, remove the lid, reduce the heat to 450 degrees Fahrenheit (225 degrees Celcius) and bake for another 10-15 minutes until golden on top.
You’ll know the bread is ready when knocking on the bottom of the bread with your knuckles and it makes a hollow sound.
Let the bread rest on a cooling rack for a while before slicing into it.
Warning; It’s easy to eat the whole loaf at once!


Gluten-free options??sandy
Hi Sandra, I am not an expert on gluten free breads so am not sure to give you anything super specific as I haven’t tested this recipe with a gluten free flour… sorry! I’d say that in general gluten free flours (premixed such as Bob’s Red Mill and King Arthur_ might work but keep in mind gf flours soak up more liquids so you might want to adjust the liquid amounts. Wish I could be of more help!